Eight Tips for Better ADV Photography
There are few riders who don’t want to return home from their ride with at least a couple of magazine-worthy hero shots. And, although most of us have a camera phone and an automatic, or even a DSLR, we’re left unsure as to how to get the most out of them. Let me tell you, leaving your camera in “Auto” mode isn’t going to get the job done, but I’ve got some solid advice that will up the odds in your favor.
1. COMPOSITION AND PHOTO RULES
There are a few key elements that go into making a great photo, and while a high-end camera can make some difference, it doesn’t make all the difference. A good photo is often more about capturing an interesting or strong composition that draws in the viewer and tells a story.
One of the oldest and most accepted rules is to create images around the “Rule of Thirds.” Imagine dividing an image into thirds by drawing two horizontal and two vertical lines across it—equally spaced—then placing the elements of your photo at the intersections or along those lines. Therefore, if you were shooting a landscape you could put the foreground in the lower third, the mid ground in the center and the sky in the top third. Just remember that rules are meant to be broken and I’ve seen some great images that work because they are created with such disregard for the “normal” rules of composition that they’re immediately interesting. That said, thinking about the Rule of Thirds is a good place to start.
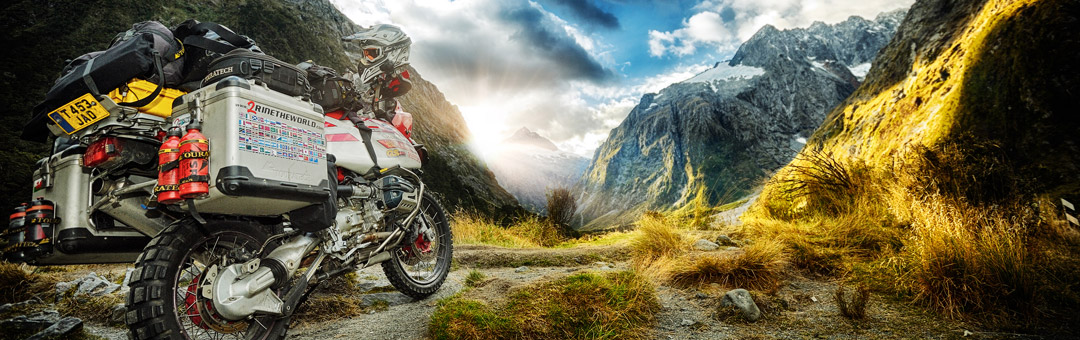
 Framed by mountains, Lisa rides her trusty BMW F650GS at Milford Sound on New Zealand’s South Island.
2. KNOW WHAT YOU’RE GOING TO CREATE
I was recently asked if there is one key piece of advice for taking better photos. After a few moments of thought, I replied, “Know what you’re going to create.” The best photographers I know can actually imagine what the finished photo is going to look like before they’ve taken it. They can see the edges of the photo, the elements that make up the image, which parts are dark and which are light, even what elements are in or out of focus. Even if you just try doing this, I guarantee your final photos will look better. Knowing beforehand what you want to create is like having a destination in mind when you set out on your bike. You wouldn’t jump on your favorite ride without any gear and just ride, hoping you’ll fall in love with wherever you end up. Photos are the same, if you know where you want to arrive, then you can correct and change course as you go and your images will thank you for it.
 This portrait of a Mongolian Eagle Hunter with his Golden Eagle was shot in northwest Mongolia close to the Atlas Mountains.
3. ANGLE OF THE DANGLE
Have you ever had a friend ask you to look at his or her ride or holiday images? After a while, they all look the same, because all they did was hold the camera in front of their face and press a button. The result is that all the images are taken at head and shoulder level and have little to no depth.
So, don’t make the same newbie mistakes. Get up high or get down low, but do whatever it takes to create a new angle. Sometimes the best photos can be of something or somewhere familiar but taken at such an interesting angle that it gives the viewer a new perspective on something they thought they knew well.
 After 172 days without rain in Australia’s Outback, a 12-minute downpour creates a surprise rainbow over the sandstone buttress at Rainbow Valley.
4. TIMER DELAY
Snapping award-winning images of yourself is the toughest gig. You’ve literally got to pre-picture the photo, set up your camera and then ride through the shot and hope the universe aligns while you capture what you wanted. Key to all of this happening is getting familiar with your camera’s time delay feature. If you’re using a budget automatic camera that will only take a single image after a delay of 5-20 seconds then you have to do a dry run. If your camera’s maximum delay is 20 seconds, you’ll need to visually spot a place on the ground where you want to grab the image, pre-focus your camera on that spot and then practice riding away from the camera, turning around (quickly) and riding back to that spot in the 20 seconds your camera gave you. Be prepared to make as many runs as you need to get the image. Trust me, your effort will pay off.
If you have a high-spec DSLR camera, then you’ll still need to pre-focus on the area you want to hit as you ride through the frame. But by putting your camera in time-lapse mode you can instruct your camera to take a photo every one second to every 10 seconds. Setting your camera up for a photo every second means that after your “photo run” you’ll have the best possible chance of being caught within the focal range, so you’re in focus and you only have 30–40 images that you’ll need to delete. You’re only going to keep the good images, right?
 Simon sets up to photograph the sunrise over the Grand Canyon.5. USE A TRIPOD
There are a few reasons to use a tripod, but let me start with one that I know will appeal. When you use a tripod, everyone around you is going to think that you’re some kind of pro. You may even get asked for advice. Okay, so I now have your attention….
Between wind, moving vehicles, buzzing distractions, earthquakes and tidal waves, it can be a challenge to get your camera into exactly the right position to grab that perfectly composed image you’ve imagined. Using a tripod means you can get your shot 99% perfect and then, as slowly or as quickly as you want, make micro adjustments until you’re satisfied before hitting the shutter release. There’s the more obvious reason, of course, which is that no matter how stunning your composition, if the photo is blurry and out of focus, no one’s going to be impressed by it.
Remember what I said about creating interesting angles in your images. Bikes like being photographed from very close to ground height. It makes them look bigger, creates an interesting point of view and, with a starry sky or skyscraper behind, can make a great image. However, let’s face it, crawling around on your hands and knees isn’t fun. The point is that, by using a tripod, you can keep your crawling to a minimum and let the tripod do the work. It makes life easier.
 Tall mountain peaks frame a stunning sunset, east of of Milford Sound on New Zealand’s South Island.
6. GETTING FLASHY
Your camera’s flash is only for shooting in dark conditions, right? Wrong!
Many people miss the opportunity to capture stunning images because of difficult lighting situations, like shooting in the direction of the sun or toward very strong backlighting. Using your camera’s detachable or built-in flash can greatly improve your chances of snagging that once-in-a-lifetime shot, in spite of that awful sun glare or overpoweringly bright backlight.
If you read any fancy photographic books or magazines, you’ll come across the term “fill light.” What’s fill light? It’s just photo speak for using your camera’s flash to brighten a foreground element of your photo that would normally be dark or even silhouetted because of bright backlit conditions.
One of my favorite photos from our ride to Prudhoe Bay was shot directly into the sun with my bike parked up on the Dalton Highway in Alaska, as we rode south from Deadhorse. I wanted a shot that showed my bike with my bags and gear from a different angle and totally covered in the grime of the Haul Road (Dalton Highway). The only way this image was going to work was if I could trigger my camera’s flash to fire, even though the camera detected that it was bright enough not to need it. Hence the term “force-flash.”
The flash is the key. It allowed me to manually expose the shot in order to capture some of the details of the clouds and landscape in the very bright background but, crucially, also the detail and texture of my bike in the foreground. You just need to practice, and I recommend finding a tutorial about camera settings on YouTube.
 The worn and weathered skin of a young boy in Pakistan contrast with his golden eyes to create a stunning portrait.
7. DON’T STAND SO CLOSE TO ME (Yeah, like the Police song)
I could go into a monologue about camera specs but that really isn’t what this article is about. I was given a great piece of advice years ago, when I asked a photographer whom I admired how to get great portraits. I’d like to pass on his words of wisdom… brace yourself.
“Find the person that you want to photograph and get close, then get closer and then move one step forward. When you’re in position, half that distance again.” I remember thinking “What… that’s it?”
Of course it’s not, but this one simple piece of advice will get you 90% toward capturing some great portraits. My other favorite is when it comes to shooting portraits, try not to let your subject know they’re being photographed. Everyone poses, and I mean… everyone! I’ve photographed presidents and Maasai warriors, Tuareg nomads and business moguls, and everyone shifts their stance if they know they’re being photographed. Which means, whatever expression or pose you saw someone projecting that inspired you to photograph them will vanish the second they sense they’re being photographed. You’re going to have to get over that weird feeling of invading someone’s personal space, or use a telephoto lens.
 Simon spent 40 minutes climbing into position in order to create this wonderful composition of Mayan Temple, iguana and moon.
 8. BE SPIELBERG
Shooting groups of people can be a nightmare, especially when you don’t speak the same language. So, to snap an intimate or powerful group shot you’re going to need to take control. Interestingly, it’s easier than you think. The camera in your hand automatically gives you an accepted level of authority and people will accept your guidance and advice, as long as it’s given respectfully. Don’t be afraid to physically move people into or out of the shot; as long you do it with a sense of humor you’ll be amazed at how easy it is to get people into position. Just make absolutely sure you show your group the photo after you taken it, especially if you’re abroad.
Alright, I’m off to photograph a stunning sunset, so go grab your camera and start practicing. Remember to share your images on the ADVMoto Facebook page.
Simon and Lisa Thomas are considered by many to be the world’s foremost adventure motorcyclists, with more real-world experience than anyone on the road today! They’ve ridden their way into a life that most of us can only imagine. Since setting out on their journey in 2003 the duo has so far amassed a whopping 450,000 miles on their ride, through 78 countries on six continents. Along the way they’ve traversed 27 deserts, survived a broken neck in the Amazon, cheated death and are still traveling today. It’s easy to say that Lisa and Simon helped define what we now call “Adventure Riding.” As explorers, writers, photographers and public speakers this pair inspire adventure. 2RidetheWorld.com
Click to enlarge image ADV-photography-tips-1.jpg 


https://adventuremotorcycle.com/tech-n-tips/better-adv-photography-tips#sigProId85196910e8